Friday, December 21, 2012

Suprise Baby Jacket

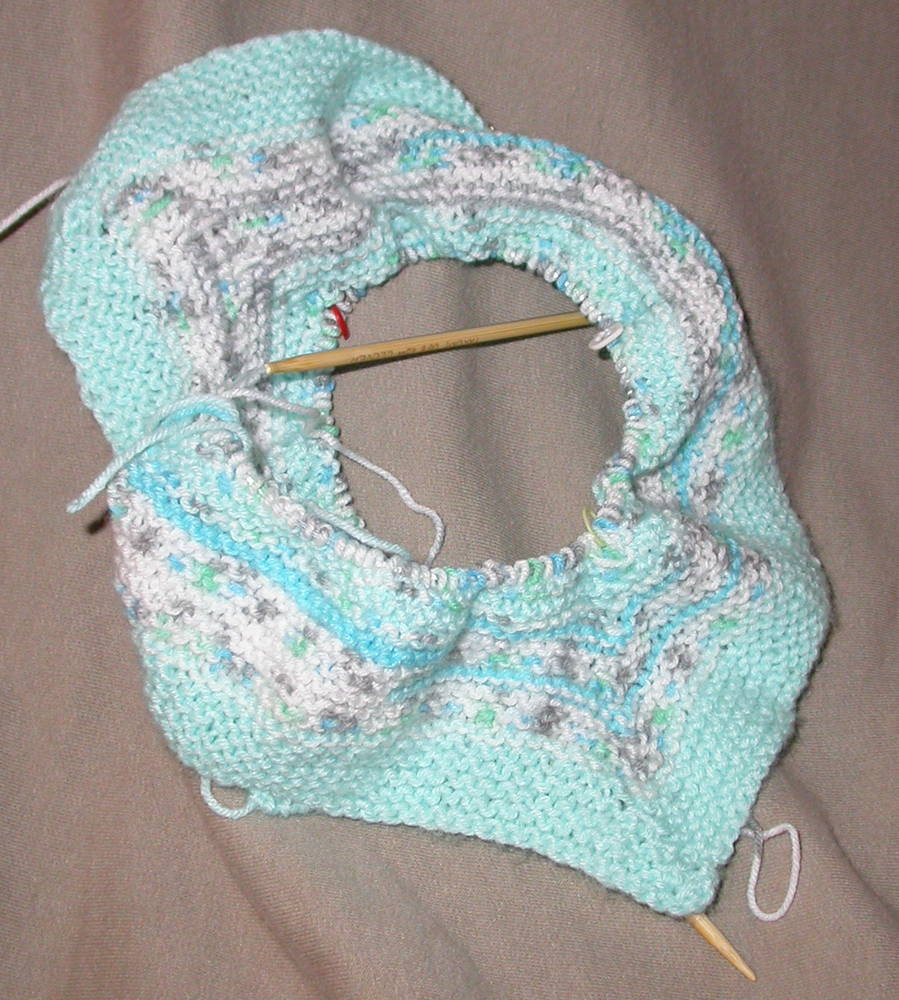
Last week I bought yarn (Sensations Cuddle from Jo-Ann's) and began a baby sweater for a coworker. I'm using the Surprise Baby Jacket pattern by Elizabeth Zimmerman. I made one before and they're fun.  I got a lot done while waiting for hubby to get some followup tests at the doctor on Monday.  It's all garter stitch so it's pretty quick.

Many thanks to World Embroideries for suggesting the crochet cast on. I hadn't used it for a bit but it was perfect for this.  Part of the cast on edge becomes the bottom edge of the sleeve. 

Wednesday, December 19, 2012

Small zippered pod tutorial

I learned about this little project from a tutorial by Susan Fletcher of A Threaded Needle, in an e-mail newsletter from her that I subscribe to. Many of her designs feature Sashiko, which I enjoy. This is a quick little sewing project to make a tiny zippered case.

I didn't follow her plan exactly.  She used buttons for the end pieces, I used quilter's template plastic. Her cases were much smaller than my first trial--I think I'm going to reduce the size of my remaining end pieces to make my next ones smaller.  This is mostly trial and error--my idea of fun!

Supplies needed are a 4" zipper, fabric to cover the zipper sides (the sides of your pod) and the ends, and a round support for the ends. It can be a button (1-1/4" to 1-1/2") that you cover with a circle of fabric and then back with a small piece of fabric to cover the open back or, what I did, two circles of template plastic cut to the sizes you want--one the exact size (the outside) and one a little smaller (the inside). A small piece of thin batting or felt--enough to cover your outside circle to round it a bit. You will also need a piece or ribbon or fabric to cover the gap where the zipper ends meet.
First cut two pieces of fabric, the length of your zipper and width of your choice. As I was doing this, I realized that both don't have to be the same--one could be longer (say, a lot longer, to hold pencils or knitting needles). The piece needs to be twice the length you want plus an allowance for a turn under. (So the zipper will be encased on both sides and your little case will be finished inside and out.) Fold the fabric in half, wrong sides together and then fold under the seam allowances. Press.
I used the machine to stitch my sides onto each side of the zipper. For some of my "pods" I used a plastic coated cotton--it was a bit hard to sew by machine--the foot pushed the fabric. (I probably needed a Teflon foot for the machine.) So the photo has glare and the zipper is not lying nicely flat. Stitch the fabric to the zipper with the seam allowance folds lined up on either side of the zipper. I found it easiest to zip and unzip the zipper as I went to stitch with the zipper head out of the way.
 
Here are my pieces for the an outside end--fabric, felt, plastic. I'll gather the fabric over the felt and plastic and stitch it together. I made two for each end--one slightly smaller (shown on the right) and then slip stitched them together, the smaller one centered on the larger, with the gathered edges of both hidden.
Slip stitch one side of the covered zipper to the circle. There will be a bit of a gap at the ends. I cut a second piece of fabric, wide enough to cover the gap plus a turn under allowance, and twice the depth with a turn-under allowance.  

Stitch one turned under end to one end of the zipper on the outside, fold over and stitch on the other side of the zipper so it's finished on both sides. Measure around your outer circle and mark the second end, turn under a seam allowance and stitch to the other end of the zipper (I found it helped to tack the two sides of the zipper  beyond the coil together a bit--they want to separate and flop).  Then fold under the seam allowances at the open edge and tack them together before stitching it to the round end of your pod.
 
 Here's a finished pod. I added a key ring to the zipper pull.
As I was planning this project, I used one of my favorite tools. I bought these years ago--June Tailor circle templates. They are in graduated sizes, 1" to 6". I used them for marking the template plastic circles and also for marking the circles of fabric for the ends.

Friday, December 14, 2012

a little stitching

I'm still not doing much stitching. I am busy and having fun, just not with a needle right now. Yesterday I mailed out our Christmas cards, with our first-ever holiday letter. Hubby and I wrote it together, which was pretty cool. Now they're all signed, stuffed, addressed, stamped, weighed and in the mail. I've been going to the gym a bit more often. (Still not often enough, but two nights a week is twice what I was doing before!) The weather's been nice enough that I can take my short morning walk most days. Last night I had a lovely evening out for dinner with World Embroideries.Chili, cornbread, cherry pie...and knitting.  

Next week I have another dinner with a friend planned and a long overdue girls day with my sister and sister-in-law. (with a sleepover at my sister's!) I can't wait.

I finished up four ornaments using my Crayola prints. Some were pretty faint so I used them, unembellished, for the backs. 
This photo is a bit late in getting posted--it is the lovely ornament I received in the NANI ornament exchange earlier this month. It was stitched by Carol J and I just love it--especially the little heart the snowman is holding.You can't see it in the photo, but his nose is a 3-D carrot bead. Very cute!

Tuesday, December 11, 2012

Awash in Color

This past rainy weekend, Hubby and I headed into Hyde Park to visit the Smart Museum of Art on the University of Chicago campus.  We went to see an exhibit I'd heard about that featured Japanese and French prints. It was a wonderful exhibit, much larger than I'd expected, and full of information and lovely prints.  We had a great time.

The afternoon was topped off with a late lunch and tea in the Smart's cafe, looking out of their floor-to-ceiling windows onto the courtyard while we discussed the exhibit. Perfect.

If you're in the Chicago area, don't miss this one!

Awash in Color: French and Japanese Prints October 4, 2012 – January 20, 2013
The rise of color printmaking in France in the late nineteenth century is often attributed to a fascination with Japanese woodblock prints, which began to circulate in great numbers after the opening of Japan in 1854. But a closer look at the history of color printmaking in these two cultures reveals that the story is not so simple. Parallel traditions were flourishing in both France and Japan well before 1854. And, when the two cultures met, the channels of technical and aesthetic influence flowed in both directions, not merely from East to West. 

Embracing these complexities, Awash in Color explores the roles, functions, and technology of color in French and Japanese prints. It features more than one hundred and thirty prints and illustrated books dating from the eighteenth to twentieth centuries, drawn from the Smart Museum’s substantial holdings as well as major public and private collections across the country. These exquisite works reveal two unfolding traditions—each shaped by artistic experimentation and technological progress—that came to complement each other aesthetically, even while preserving their own distinctive features.

Friday, December 7, 2012

Coloring time!

I've been having a whole lot of fun with these--Crayola Fabric Crayons. My box doesn't look like this--it's pretty old. I unearthed it last weekend while cleaning. They're simple to use--draw a picture on plain paper using the crayons, iron it onto fabric. My problem is/was that the fabric needed to be polyester. I know, ugh! So my crayons were never used beyond a test last year for our putting designs onto fabric class. I learned then that the finished fabric is nice--not stiff or waxy. Just polyester.
Then I realized I had bought a large remnant of Jo-Ann's Felt. Polyester felt. It worked brilliantly with the crayons. This is my original drawing on the left (after being used), random rows just to test how they work and how true the colors are. On the right is the drawing ironed onto the felt. Pretty cool, huh?

The colors are somewhat true.  The red is quite pink, the terracotta more orange than brown, the purple prints more lilac, and the black more brown than black. But yellow, blue, green and orange are pretty true.  And now I know.
For this sample I printed the design a second time. This time onto polyester chiffon layered over felt. The design printed through the chiffon onto the felt. Both were much fainter than the original but still visible. I turned the felt top to bottom and then stitched the chiffon over it. Just to play. You can see a bit of the shadowy under design here. And, no, I have no idea what I plan to do with either of them.
So, I decided to try ornaments. And alphabet tags for gifts. Here are my designs after printing. (I did them on graph paper to try to get squarish squares.
Left to right: second printing of ornaments, first printing of ornaments and letters. Do you see the problem?  I forgot to reverse the letters. Some were okay (H), some I could flip upside down (K). I redid the rest (S). 

The designs from the second printing are really faint but do provide some color. I've embroidered over a couple and used others as ornament backs.  The first printing is much clearer. I've tried minimal stitching or a few beads with them and it looks festive. I've been making them into small ornaments, maybe 2-1/2" square.  I'm using the letters as they are, tied to packages with ribbons.  

I think this would be a great project to do with kids, as long as the ironing was done by an adult or supervised. Sheets of felt are inexpensive and easy to finish.

Tuesday, December 4, 2012

Amy Butler Eye Candy

For a lovely dose of eye candy and good feelings, check out Amy Butler Design's new publication, Blossom! It's online free to view. Amazing images, positive vibes, and inspiration that are very good for the winter blues. 

Sunday, December 2, 2012

Renee's Shower

Among the other things I did last week (mostly, I felt, doctoring), I hosted a small shower for a good friend.  Renee and her fiance have been together for 57 years and finally decided to make it official! (yes, that is fifty-seven!)  We had a blast!
We met at a local restaurant's small private room. Here's most of the group sitting around chatting before dinner.
We added our wishes to a "tree" for the couple. I made small favors and Renee made us all a jar of her famous French Dressing.
Here's the Bride-to-Be in her "official" Bride hat. We all talked about how we met Renee (and how long we've known each other!) and about how she and Mel met in college and how the wedding came about, her dress and her ring. Girl stuff. The ceremony will be in a week. I'm sure it will be lovely.
Best wishes to the Happy Couple!